GraphQL is becoming a common technology being used to build APIs. When it comes to clients consuming these APIs, there are a collection of tools available to make this process smoother – one of these tools being Apollo Android. This library allows you to take your graphQL schema and generate a type-safe API to execute operations against.
If you’ve previously used tools such as Retrofit to communicate with REST APIs in your Android projects, imagine having strongly-typed operations for your GET and POST requests, as well as generated models for the responses that are returned. Even the generation of models alone is enough to hugely reduce the amount of networking code that we need to write for our apps! Apollo Android offers exactly this for when it comes to communicating with GraphQL APIs.
When it comes to getting started with Apollo Android, there are several steps that are required:
- Add the required dependencies to your project
- Add a copy of your GraphQL schema to your project
- Define an instance of an Apollo Client
- Write a GraphQL file defining a Query or Mutation
- Execute an operation using the Client and your defined Query
In this article I want to cover these steps to take a quick look at how we can get setup with Apollo in our Android projects – we won’t dive into all of the extensions that are available (it is a super flexible project), but we’ll cover enough for you to get started yourself.
The Apollo Project
The Apollo Android project lives over on GitHub – it’s completely open-source, which is a great way to be able to get familiar with what it has to offer and how it works. The Apollo client for Android can be used to generate a type-safe API from a given GraphQL schema, allowing you to communicate with your GraphQL APIs. When it comes to the Apollo Android project, there are 5 different modules which the project offers:
Apollo Runtime
This module contains everything you need for getting started with Apollo Android. If you’re looking to get up and running with the tool in your project, this will be the place to start. You can see this as the core dependency that contains the Apollo Client and everything used for executing operations against it.
implementation "com.apollographql.apollo:apollo-runtime:2.4.6"Apollo API
Whilst the Apollo Runtime module offers everything that we need to get started with the tool in our project, there may be cases where we wish to run our own HTTP layer and not depend on the Apollo Client for this. Because Apollo Android offers much more than this networking layer, it can still be an incredibly useful tool without it. So in cases where you still may want to use the generated Apollo models and parsers for your schema, the Apollo API module
In the cases where you wish to run your own HTTP layer, the Apollo API module can be used to offer generated models and parsers.
implementation "com.apollographql.apollo:apollo-api:2.4.6"Normalized Cache SQLite
When it comes to caching data from network responses, an in-memory cache can be used out of the box to provide a basic level of caching. However, in cases where this is not suffificient for your cache requirements, the apollo-normalized-cache-sqlite module allows you to bypass this in place for an SQLite database.
implementation "com.apollographql.apollo:apollo-normalized-cache-sqlite:2.4.6"Coroutines Support
When performing Apollo operations, the returned ApolloCall can be scheduled and observed. However, we may not want this out-of-the-box behaviour and instead may wish to handle our operations using coroutines. In these cases, the coroutines module offers a collection of extension functions which can be used execute Apollo operations using coroutines.
implementation "com.apollographql.apollo:apollo-coroutines-support:2.4.6"RxJava 3 Support
Similar to the support for coroutines, you may wish to execute your apollo calls in an RxJava fashion. If this is the case, Apollo Android offers some extended functionality which is available in the rx3-support module – allowing you to utilise concepts such as the Completable, Single and Observable.
implementation "com.apollographql.apollo:apollo-rx3-support:2.4.6"Setting up your project
To get started with Apollo Andorid in our project the first thing we need to do is add the plugin to the classpath, this will be done within the build.gradle file of our project.
classpath("com.apollographql.apollo:apollo-gradle-plugin:2.4.6")With this in place, we can now go and enable the plugin in our module level build.gradle file – this will be for the module where Apollo is going to be used. This plugin is required for the code generation based on your schema.
plugins {
    id "com.apollographql.apollo"
}
We’ll then go ahead and add the dependencies that we require for our project. Here we’re going to add the runtime and coroutines modules within our module level build.gradle file.
implementation "com.apollographql.apollo:apollo-runtime:2.4.6"
implementation "com.apollographql.apollo:apollo-coroutines-support:2.4.6"
Finally, if you’re using kotlin in your project then you’ll want to enable the use of kotlin for any generated models. This can be done by adding the following within your module level build.gradle file:
apollo {
    generateKotlinModels.set(true)
}
With the above in place, your project should compile and you’ll have everything you need to get started with Apollo Android!
Adding your GraphQl Schema
Before we can start interacting with our graph, we’ll need Apollo to generate the required code – and in order to do this, Apollo needs access to our schema. For this we’ll need to add a copy of our schema to the project – this needs to be placed within a graphql directory in the main directory of the module that the graph is being used in. For examples sake, we’re going to use the schema for the GitHub GraphQL API.
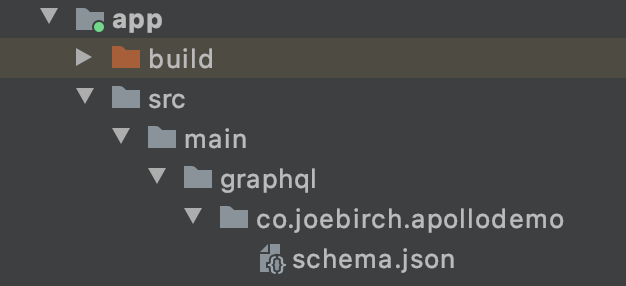
Whilst in this example I have simply copied the schema into the project, in the long term I would likely have some form of automation in place – that’s a post for another day though 😎 It’s important to note that the schema must be placed into a graphql/ path as shown above – Apollo will use this to locate your schema and will fail to find it otherwise. In these cases you will see an error such as ApolloGraphQL: cannot find schema.[json | sdl].
Adding Queries and Mutations
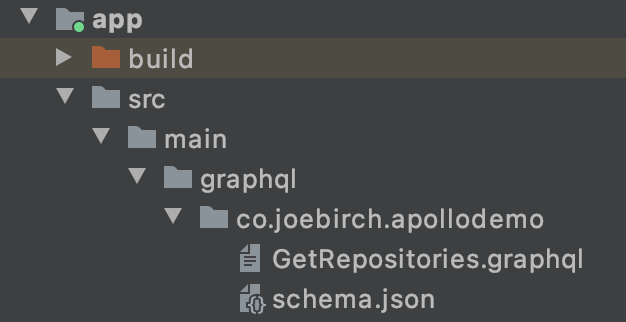
Now that we have our schema in place, we’re going to want to setup our first query. Whilst we need to write this query inside of a graphql file, Apollo will take that declaration and generate the classes which can be used to execute that query. We’re going to go ahead and create a new file, GetRepositories.graphql, in the same directory that we placed our schema.json file.
Note: This query won’t be able to be executed without some form of authentication, we’re going to skip over that in this article and focus on the the tooling itself.
Then inside of this file we’re going to go ahead and write the query that will be used to perform the desired operation. This will vary on your use case, but here we’re going to retrieve a list of repositories for the currently authenticated user:
query GetRepositories($count:Int!) {
 viewer {
  name
   repositories(last: $count) {
     nodes {
       name
     }
   }
 }
}
With this in place, we should be able to build our project and see that Apollo has now generated the required code to be able to use this query inside of our project.
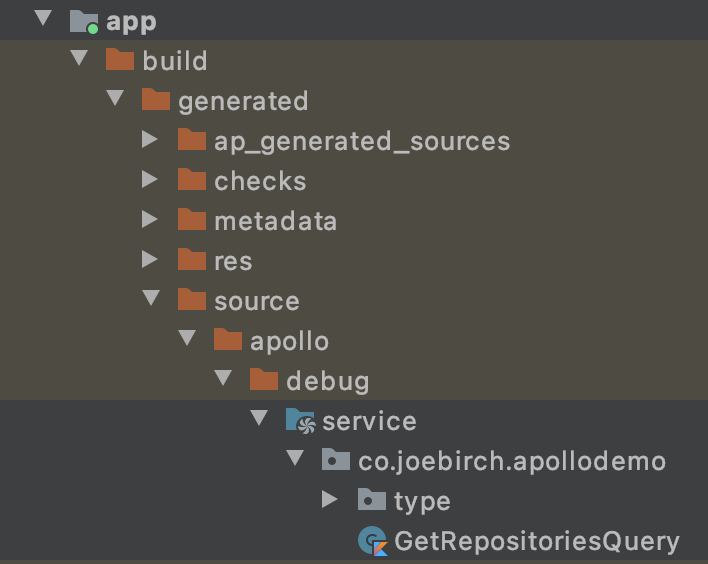
We won’t deep dive into this generated code here but what Apollo has done is take the query defined in the .graphql file and generate a strongly typed query class from it. We can see here, at a high-level, that Apollo has generated a data class that represents our Query. This class takes a parameter of the type that we initially defined in our query, returning a typed representation of the response.
data class GetRepositoriesQuery(
  val count: Int
) : Query<GetRepositoriesQuery.Data, GetRepositoriesQuery.Data, Operation.Variables> {
Now that we have this generated class, in the next section we can utilise this to perform a query using the Apollo Client.
Building an Apollo Client
Before we can start using our query from the previous step, we need to create a reference to the ApolloClient class – this will be used to execute the generated operations on our graph. For this, we’ll utilise the builder that the ApolloClient offers to construct an instance of the class. The builder offers a collection of ways to configure the client, there were a couple of things which stood out to me as things I would often use, so to give you a small taste of what is on offer:
- serverUrl(): This is used to define the url of the API that is going to be communicated with
- okHttpClient(): Provide an okHttp client reference to be used when making requests
- logger(): Provide an instance of a com.apollo.graphql.logger to be used for logging
- addApplicationInterceptor(): Add an ApolloInterceptor that can be used to observe the entire lifecycle of a request
- defaultCacheHeaders(): Provide a key/value pair collection of cache headers in the form of an apollo CacheHeaders reference
- defaultHttpCachePolicy(): Declare the cache policy to be used for GraphQl operations other than mutations
- httpCache(): Provide configuration (in the form of an Apollo HttpCache reference) to be used for the request + response cache
- dispatcher(): Provide an Executor reference to be used when dispatching requests
- addCustomTypeAdapter(): Add an adapter used for serializing and deserializing custom GraphQl scalars
As mentioned above, there is a lot more functionality on the builder, the above just outlines some of the more commonly things that may be required. Check out the documentation for more information on what is on offer here!
When it comes to creating an ApolloClient reference, at a minimum we need to provide a server url for the API that we are going to be communicating with. We’ll do this using the serverUrl() function on our builder, passing a String as the url argument. There is also a serverUrl() builder function that takes an HttpUrl reference if that is better suited to your needs.
private val apolloClient = ApolloClient.builder()
    .serverUrl("https://api.github.com/graphql")
    .build()
After calling build() on our builder reference, we now have an ApolloClient ready for use within our project. If you need any extended functionality, you can use the builder to configure this.
Executing an operation
With our Apollo Client in place, we’re ready to execute our generated query. For this we’re going to utilise the query function of the ApolloClient – this takes a reference to a generated Query class and returns us a reference to an ApolloQueryCall class.
apolloClient.query(GetRepositoriesQuery(count = 3))We can see here how we’re utilising our generated GetRepositoriesQuery class – for me, the typed arguments in the query constructor already sells this to me! When providing a Query class to this call, the Apollo client will take the internals of this and use it to execute the operation on your graph.
As previously mentioned in this article, we added the apollo coroutines dependency to our project – this means that we can execute these calls using concepts that we may already be familiar with or using in our project. For example, we could do the following:
val response = apolloClient.query(GetRepositoriesQuery(count = 3)).await()Await is a suspending function which gives us a Result object that represents the response of our request. So if we want to return the result as a suspending function, we could end up with something like so within our project:
suspend fun retrieveData(): GetRepositoriesQuery.Data? {
   return apolloClient.query(GetRepositoriesQuery(count = 3)).await().data
}
However, not everything here might have executed as expected – or we may want to massage the data in some way before returning it. Let’s move on and take a look at what information this response provides us with.
Handling Response Models
When we execute an operation using Apollo, we’re going to get back a class that represents that response. As mentioned above, in the case of the Query above this will be a Response<T> where T is GetRepositoriesQuery.Data. Whilst this model has a lot of properties which we can access, we’re going to focus on a couple which are enough to get you started with handling a response.
- data: This represents a nullable property of the response type, in this case this is of the type GetRepositoriesQuery.Data.
- errors: This represents the errors that have been returned in the response. This is a nullable list, so if that list is empty or null then the request would have been successful
- hasErrors: This is a convenience function which checks whether errors is null or empty.
We’ll focus on the data property here, as this is going to allow us to use the response information to build out our application. For this property, this is going to match the structure of the query that we previously defined. Forgetting about any query parameters, the structure of our query takes the following form:
viewer {
  name
  repositories {
    nodes {
      name
    }
  }
 }
Our data property in the response model is going to look very similar:
data class Data(
  val viewer: Viewer
)

data class Viewer(
  val name: String?,
  val repositories: Repositories
)

data class Repositories(
  val nodes: List<Node?>?
)

data class Node(
  val name: String
)
As we can see here, Apollo has generated the response structure that matches what is defined in the schema – giving us a typed representation of what our client is expecting back from the server. We can use these properties as required in our application, presuming the no errors have occurred! For this we will need to utilise either errors or hasErrors(), as well as catch any exceptions that might have occurred when making the call. With this in mind, we could end up with something like the following defined in our project:
try {
    val response = apolloClient.query(GetRepositoriesQuery(count = 3)).await()
    // handle response and return it
} catch (e: Exception) {
    // handle error and return response
}
With this in place, we have a starting point for executing requests against our GraphQL schema!
One final thing that I want to mention here is the use of these generated models. If you’re going to be utilising this functionality of Apollo, in the long term I would recommend mapping these to a model representation that is defined in your app. If you end up passing Apollo models throughout your app, your whole codebase becomes tightly coupled to the Apollo library.
With all of the above, we have enough knowledge to be able to add Apollo to our Android project, generate typed models and classes from our schema, followed by being able to execute these operations using the Apollo Client. The Apollo library has a lot of extended functionality and can be very flexible in how it is used, in this article we have only touched the surface to get started with using it. With that said, I hope you have fun exploring Apollo Android and that it improves the implementation of your networking stack within your Android applications!