When building Flutter applications, we have the ability to create native components which are styled for the native experience on both Android and iOS. Whilst by default we may implement things in a material style, it is important to bear this native experience in mind. In this article we will take a quick look at implementing bottom navigation for the styling of both Android and iOS.

Note: The source code for the project used in this article can be found here.

Material Bottom Navigation
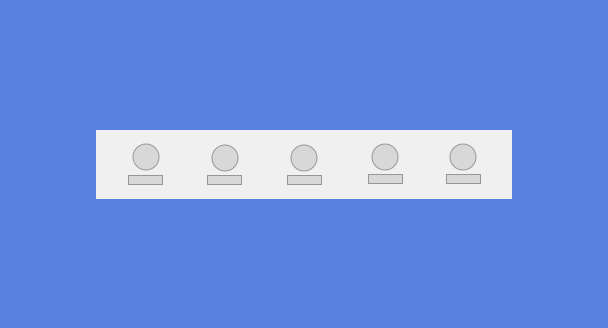
We’ll begin by taking a look at implementing the Material style bottom navigation component. Continuing from above, this looks like so:
![]()
When it comes to creating bottom navigation with a Material approach, we make use of what is known as a BottomNavigationBar — typically this will be placed within an Scaffold as the bottomNavigationBar component:
return Scaffold(
    bottomNavigationBar: BottomNavigationBar(...)
);
The Scaffold is an important component when it comes to using the BottomNavigationBar. It provides us with the capability of using the bar as its bottomNavigationBar component – because of the way the Scaffold works, the bottom navigation bar will automatically be setup using the following layout guidelines:
- It will be shown at the bottom of the screen
- It will be shown on top of any other Scaffold content
- Things such as snack-bars will shown above the bottom navigation
Whilst these are just some of the behaviours, you can see that using the Scaffold provides us with a way to display and manage the bottom navigation view with a little amount of effort.
When it comes to the BottomNavigationBar itself, there are a collection of arguments that we can provide to assign properties to the widget.
- fixedColor – This assigns a color to be used for the icon & text of the currently selected item
- onTap – This allow us to provide a listener to be used for when the bottom navigation item is selected. Within this listener you will essentially want to set the state of the currently selected item within your widget
- currentIndex – This allows us to set the index of the currently selected item within the bottom navigation. In most cases, onTap will handle the state regarding the currently selected item – and when setState is called, this property will make use of the currently selected item from the widget state
- items – This is used to provide a collection of BottomNavigationItem instances to be used for the navigation items within the bar
- type – The type used for the bottom navigation bar. This will be either:
- BottomNavigationBarType.fixed – this means that navigation items have a fixed width, always showing both the label and icons
- BottomNavigationBarType.shifting – this means that navigation items have a dynamic width, always showing their icon but only the label when the item is currently selected
With all of these properties fulfilled, our BottomNavigationBar widget construction looks like so:
bottomNavigationBar: BottomNavigationBar(
    fixedColor: Colors.orange,
    onTap: onNavigationTap,
    currentIndex: currentCategory,
    items: _buildNavigationItems(),
    type: BottomNavigationBarType.fixed,
)
Now that we have most of our BottomNavigationBar built up, we need to create the core part of the widget – the BottomNavigationItem instances. You’ll notice here we provide a _buildNavigationItems() method to provide a collection of these items , let’s take a look at what this consists of:
List<BottomNavigationBarItem> _buildNavigationItems() {
    return <BottomNavigationBarItem>[
        BottomNavigationBarItem(...),
        BottomNavigationBarItem(...),
        BottomNavigationBarItem(...),
        BottomNavigationBarItem(...),
    ];
}
Now, regardless of whether you’re using the Material or Cupertino bottom navigation bar, the same BottomNavigationBarItem class is used for the items displayed within it. This class takes a collection of properties that we can use to construct the look and feel of the item:
- activeIcon – the icon to be used when the item is currently active
- backgroundColor – the color to be used for the animated background of the item during the material style touch state
- icon – the icon to be used for the navigation item
- title – the title to be used for the navigation item

With this in mind, it’s important to note that you do not need to provide all of these properties when constructing an instance of the BottomNavigationBarItem class. For example, in Voice this what the construction looks like:
BottomNavigationBarItem(
    icon: Icon(
        FontAwesomeIcons.handHoldingHeart,
        size: 26,
    ),
    title: Text(categories[0].label),
)
You can see here that I don’t make use of all the available attributes, but the Bottom Navigation items still have the expected styling in place. As a minimum, all you really need is the icon and title properties in-order to display some bottom navigation items. When we defined the actual BottomNavigationBar we defined a fixedColor, this is what is used to color our icons when they are in the selected state.
With all that said, we now have the sufficient requirements in order to display a bottom navigation view within our app that adheres to a material style.
Cupertino Bottom Navigation
Now that we’e got an understanding of how to create a material styled bottom navigation component, we can now dive into doing the same for a Cupertino styled navigation bar. One key thing to point out here is that the Cupertino style equivalent is called the CupertinoTabBar – whilst there is CupertinoNavigationBar, this is used for tabbed navigation and not bottom navigation.

You may be looking at the above and thinking, well that looks almost exactly the same. At a first glance if you remove the fact that the iconography is larger in the Cupertino bar, then they look almost identical. But the interactions in the form of both visuals and functionality does differ between the Material and Cupertino style bottom navigation.
We begin by declaring our page scaffold:
return CupertinoTabScaffold(
    navigationBar: CupertinoTabBar(...)
)
You’ll notice that we are now using the CupertinoTabScaffold here – because we are using the CupertinoTabBar for our navigation bar, we can no longer rely on the standard Scaffold alone. This CupertinoTabScaffold is an important component when it comes to using the CupertinoNavigationBar. It provides us with the capability of using the bar as its navigationBar component – because of the way the CupertinoTabScaffold works, the navigation bar will automatically be setup using the following layout guidelines:
- It will be shown at the bottom of the screen
- It will be shown on top of any other CupertinoTabScaffold content
Whilst these are just some of the behaviours, you can see that using the Scaffold provides us with a way to display and manage the bottom navigation view with a little amount of effort.
When it comes to the CupertinoTabBar itself, there are a collection of arguments that we can provide to assign properties to the widget.
- activeColor – This assigns a color to be used for the icon & text of the currently selected item
- backgroundColor – This assigns a color to be used for the background of the the tab bar
- inactiveColor – This assigns a color to be used for the icon & text of any items that are not currently selected
- iconSize – This is used to declare the size of the icons displayed in the tab bar
- onTap – This allow us to provide a listener to be used for when the tab bar item is selected. Within this listener you will essentially want to set the state of the currently selected item within your widget
- currentIndex – This allows us to set the index of the currently selected item within the bottom navigation. In most cases, onTap will handle the state regarding the currently selected item – and when setState is called, this property will make use of the currently selected item from the widget state
- items – This is used to provide a collection of BottomNavigationItem instances to be used for the navigation items within the bar
Using these properties we can then construct the instance of the CupertinoTabBar:
tabBar: CupertinoTabBar(
    activeColor: VoiceTheme.blaze_orange,
    onTap: onNavigationTap,
    currentIndex: currentCategory,
    items: _buildNavigationItems(),
)
You’ll notice there that there are a few differences when it comes to the two widgets.
- The CupertinoTabBar does not allow the setting of how the items are distributed. In the BottomNavigationView we saw the use of the BottomNavigationBarType, the tab bar does not have any concept of this.
- There is no concept of setting an unselected colour for the items displayed in the BottomNavigationBar, not directly anyway
- There is no concept of setting the background color used for the BottomNavigationBar, not directly anyway
Whilst some of the things above are mainly visual, the first point there really ties down on the native experience – as this is not something that a user would expect to see on iOS. Other than the above points, as soon as you want to use any of the Cupertino root widgets (e.g CupertinoPageScaffold) then you will be required to use the corresponding Cupertino widgets like the tab bar.
When it comes to the items that are displayed in the tab bar, these are exactly the same as the ones we used when constructing the BottomNavigationBar. This means we can reuse the navigation items between platforms and still give the same expected experience. This is because the native look and feel is handled by the container (BottomNavigationBar & CupertinoTabBar) so the items are reusable.
As you can see from this post, the provided widgets for creating native bottom navigation are very similar in the way they are constructed. The main differences come from the containing widgets that they are used within, along with the user experience they provide when implemented. When it comes to creating native experiences, the right component helps to bring a sense of familiarity to your application – even the littlest things count!
Do you have any questions about bottom navigation and how to implement the above in your applications? Please feel free to reach out if so!