AI tooling is becoming a key part of our day-to-day and now with solid Gemini support in Android Studio, we’re seeing engineers embed this deeper in their workflows. When they work well, AI Agents can help us to work more efficiently and give us more time to focus on other tasks. But when they don’t work, it can be frustrating and we can lose trust in agents. When this is experienced early on in a developers AI journey, it can slow their adoption of AI workflows.
Agents are only as good as the context and prompts we give them, so it’s important that we configure them to work well for us. Whether this is for yourself or your team, correct configuration can help to gain trust in this tooling (and promote adoption!), while also ensuring that we are actually working as efficiently as we can.
In this post we are going to look at some simple optimisations and principles to be aware of when working with Gemini in Android Studio. Some of these concepts apply across the board, so there are likely some transferable pieces of information here also!
1. Setup an API key
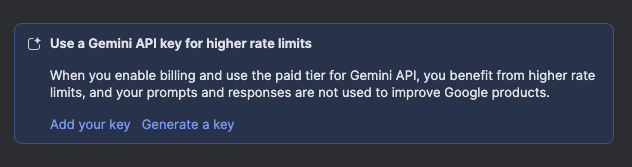
By default, you can use Gemini in Android studio at no-cost, but with a limited context window. This means that Gemini will only be able to process a limited amount of information, which is likely to limit the quality of results that you’ll see from Gemini. The more information that we can provide to Gemini in our prompt, the more context it has to work on our task – if Gemini does not have all of this information, it’s more likely to try and fill the gaps for us.
We can configure an API key from within Android Studio and doing so will allow us to utilise up to 1 million tokens with Gemini 2.5 Pro. Having access to this increased context window (and improved Gemini models) will yield us far more success from our prompts.
2. Configure Agent Rules
We can define rules for Gemini to be added at the beginning of every prompt. These rules are used to provide additional context to the agent – this is helpful for defining standards, libraries to be used, or even specify any patterns and architecture to be used when creating new files. This additional context will help to improve the results that you get from Gemini and once these rules are set within your Gemini settings, they will be applied to all prompts.
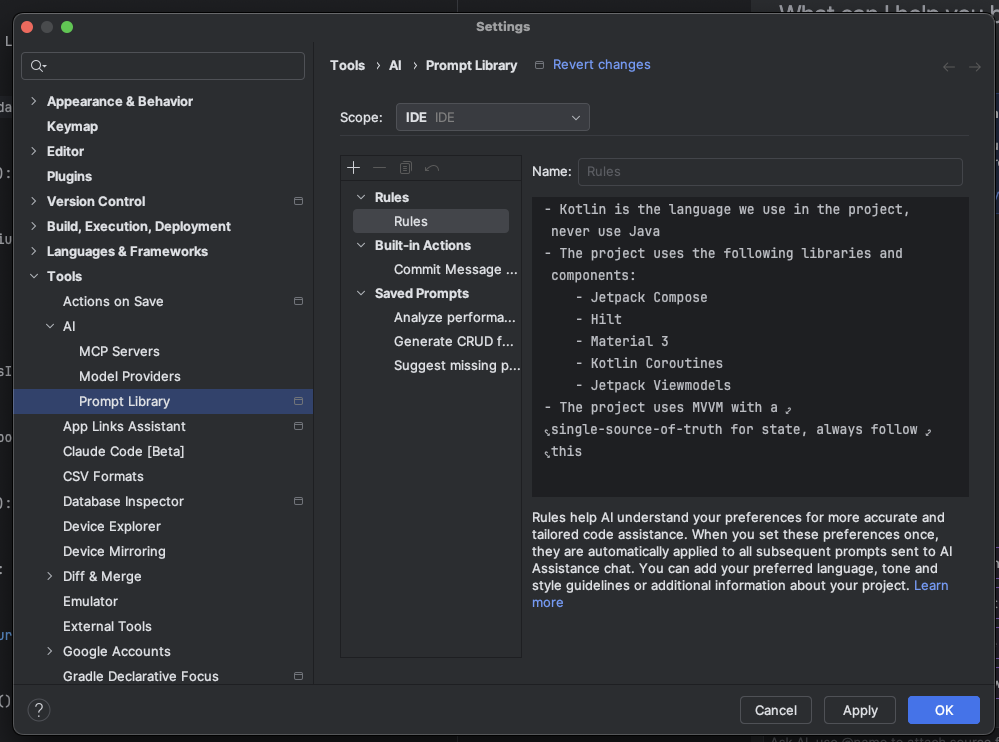
Any instructions that you add here are specific to your IDE and will not be shared across your team.
3. Configure Agents.MD files
If you’re familiar with using other AI agents, you may have configured a markdown file that can be used to provide context and instructions to an agent. Gemini allows you to provide this context through AGENTS.md files and the great thing is that we are not limited to a single one of these. For example, we could have an AGENTS.md file at the root of our project to define the global rules for our project, along with an AGENTS.md in each of our feature module and any subdirectories where we wish to provide additional context. This means that we can provide feature specific context and instructions, allowing us to keep our context window focused when the agent is performing work.
When you perform prompts, the agent will start in the current working directory when searching for AGENTS.md files and then works its way up to the parent directory. So let’s say you have an AGENTS.md at the root and in the composer feature module, performing a prompt that carries out work in this feature module will utilise both of these AGENTS.md files.
These AGENTS.md should be used to provide project specific context, coding patterns, architectural rules and even specific information on business rules and historical context. This is different from the rules that we covered in the previous step – rules are instructions and preferences that apply to all prompts, whereas the AGENTS.md files can be used to create fine-grained context that can be checked into your repository and shared across the team.
4. Optimising Agent Context
We already know that the text content we provide to an AI agent is crucial for getting successful responses, but we also need to ensure that we are not flooding the agent with information that is not useful to it. By default, Gemini will use the current file, any agents.md files and the rules defined for Gemini in your IDE.
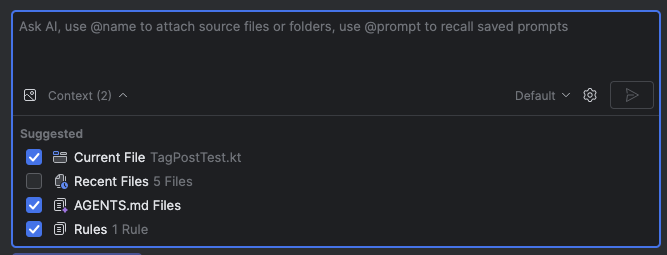
While in a lot of cases this is likely sufficient, there are a couple of scenarios where you can optimise this based on your use-case:
- If the changes you are making through the agent are not related to the current file, deselect this option. The agent does not need this additional context as it is unrelated to its work.
- If you are working across a feature that touches multiple files, the Recent Files option can be really helpful for providing additional context. Even if the agent does not need to change multiple files, having the additional context can improve accuracy. If you know that changes are going to need this context, open the files prior and select this option
- It’s unlikely that you will need to unselect the rules and agents.md files in most cases, but if there are scenarios where you are using the agent for work that does not related to other parts of your project (such as scripts or Gradle work), these could be unselected to reduce the context window.
5. A picture is worth a thousand words
Alongside optimising context, we can also provide better context through imagery. While in a lot of cases we will be communicating with AI through text, Gemini also allows us to attach images for context.
One great use-case for this are building UI from designs. For example, if you have designs for a new feature or component, you can provide a screenshot of this to Gemini along with some instructions to support the changes.

Without imagery, I’ve found that it can take a lot of text context to portray exactly what I want the Agent to build and even then, there tends to be a lot of back and forth. When using images, the Agent has a visual reference to what it needs to build – I’ve found this results in far less back and forth when compared to only working with text prompts. If you have access to images, these should always be provided as context.
6. Adding MCP server support
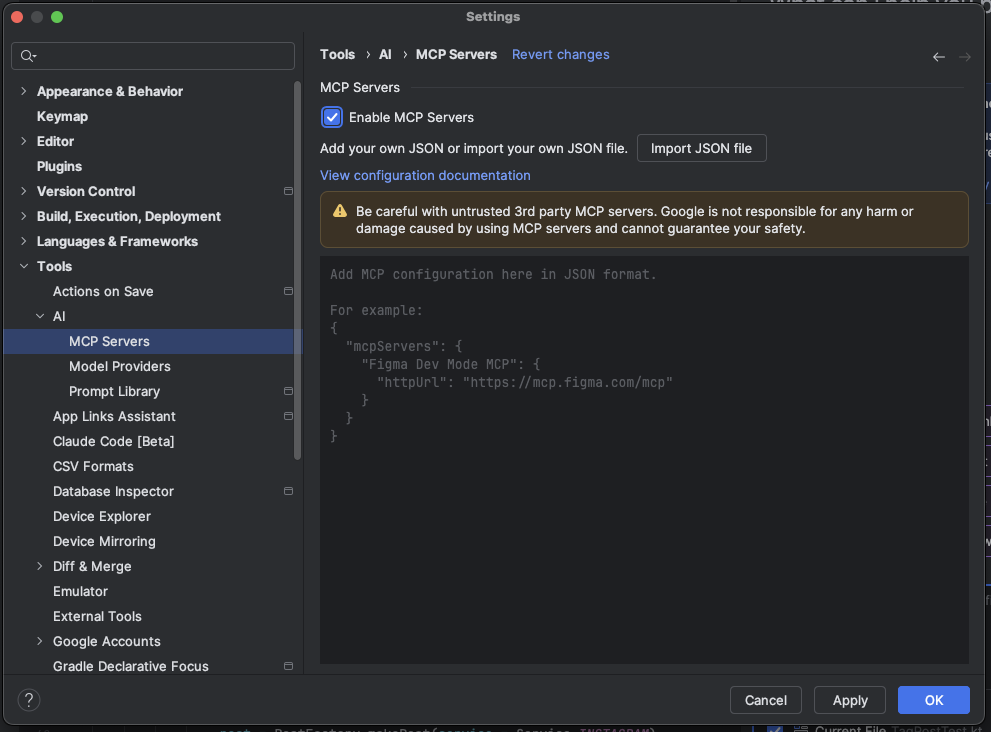
Gemini in Android studio supports MCP servers, allowing you to connect to other tools when communicating with the agent. Enabling access to MCP tools means that your agent can gain access to additional context (for example, Notion or Figma), or manage parts of your project in other tooling (for example, GitHub or Linear).
Many tools have MCP servers available to access – the additional context itself is a powerful way to provide Gemini with more information, but being able to perform actions through the agent can help you to avoid context switching through being able to remain within your IDE, which in itself is a huge win for productivity.
7. Providing direct links to files
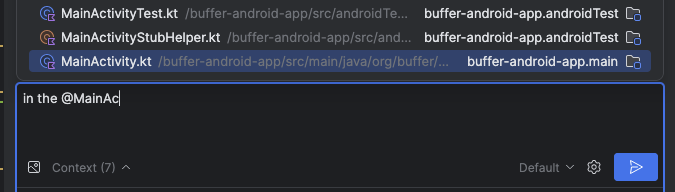
When writing text prompts, we can give Gemini context through file names to help point the agent in the direction of changes and/or context. However, Gemini allows us to directly link files within its context window – type the ‘@’ symbol, start typing the file name and you’ll be presented with the file name picker.
When typing file names ourselves and not using the file picker, we introduce some inefficiencies:
- With just the file name, the agent needs to perform a search to locate this file name so that it has the complete path and access to the file (this can be more complicated if you have multiple files within the same name, in different directories). While not a strenuous task, these are still extra steps that need to be performed
- We are only human and are bound to make mistakes – we might spell the file name wrong or even reference the wrong file. In these cases, the agent may need to request more context from us to be able to locate the required file.
Using the file picker allows us to provide greater accuracy within our prompt, while also helping to reduce the steps required to get a successful response.
8. Should I use Ask or Agent?
This last one is a small one, but can be helpful for working efficiently with Gemini! In the Gemini pane you’ll notice two tabs, agent and ask.
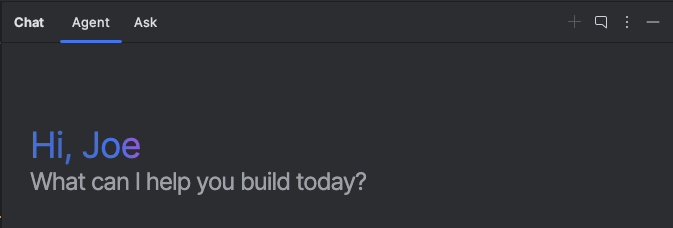
While both of these can be used for interacting with Gemini, they each serve a different purpose.
- Agent – designed to handle complex, multi-stage development tasks. The agent will contribute to your project based on the prompts you give it, request feedback and iterate on its work as you talk with it
- Ask – designed to get assistance from Gemini without having it contribute to your project. Ask specific questions, work through a problem together or have it generate code for some UI.
Both of these approaches will use the context you provide it from your project, with the key difference being whether you want the agent to make changes for you. Personally, if I’m only looking to get a quick gut check on something or I have a question on a topic, I’ll just use the Ask tab – this feels more efficient as I find this way, the conversations are usually quicker and there’s not change of triggering the agent unnecessarily.
That’s it for now! I hope these steps help you to configure Gemini in a way that helps you and your team to work more efficiently. These steps definitely aren’t exhaustive and there are likely more improvements that I uncover as I use Gemini more in my workflows. If you come across any optimisations of your own, please do share them!